The simplicity and predictability of Halo: CE's spawn system make it a powerful tool for skilled players. Players can place a teammate safely out of harm's way, or they can turn the tide of a losing battle with an aggressive spawn. Mastering the spawn system is crucial to improving as a player and as a teammate, so let's dive right in.
The Basics
In general, a dead player will spawn at the spawn point closest to a living teammate. If there are no living teammates, or if no spawn points are close enough to a teammate, a spawn point is randomly chosen.
Spawn Points
Spawn points are locations on the map where a dead player can come back to life. These spawn points are often placed in corners or easily-identifiable locations, so learning the spawns on your favorite map is not difficult at all. You can walk through the popular competitive maps by clicking Explore the Maps above.
Distance is Everything
Distance is the only factor considered when selecting a teammate's spawn point; it doesn't matter where your teammate died or which spawns the enemies are looking at. The closer you are to a spawn point, the better the chances of your teammate spawning there.
The Numbers Game
When choosing a spawn, the game checks how far you are from every spawn point on the map, and assigns a percentage to each spawn. Nearby spawns get a much higher percentage than distant spawns. It's common to have situations where, for instance, your teammate has an 80% chance of getting the closest spawn, a 15% chance of getting the next closest spawn, and a 5% chance of getting some other spawn on the map. If you're the same distance from multiple spawns, your teammate has an equal chance of spawning at each, but taking just a couple steps closer to one of the spawns will greatly increase the chance of giving that spawn.
How Far is Too Far?
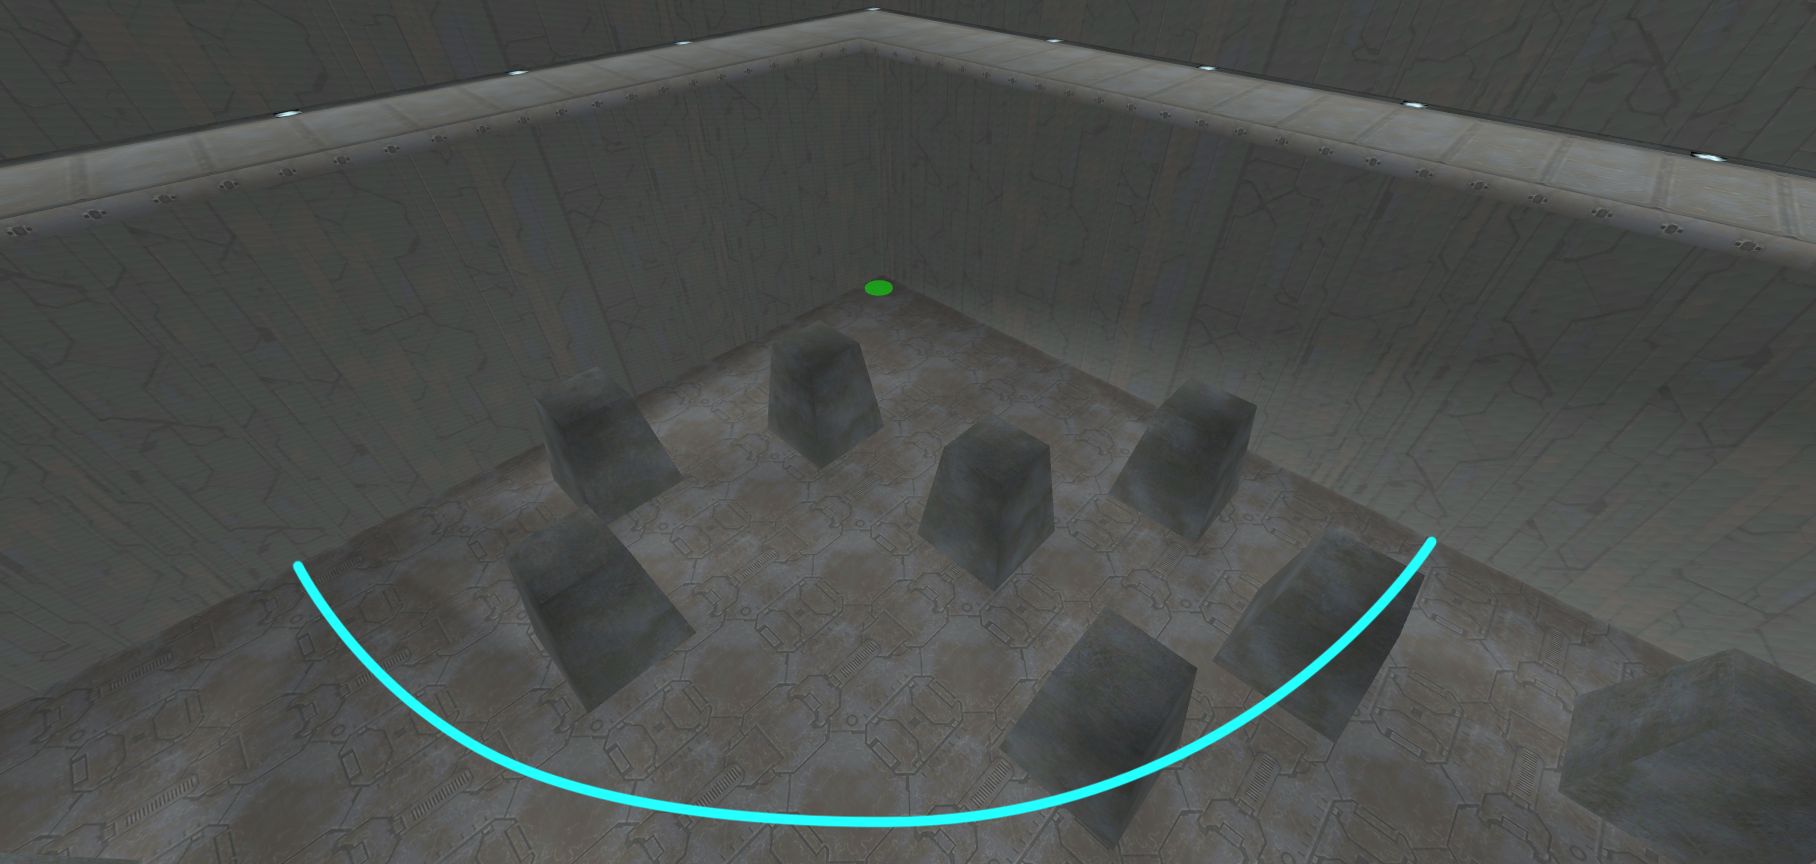
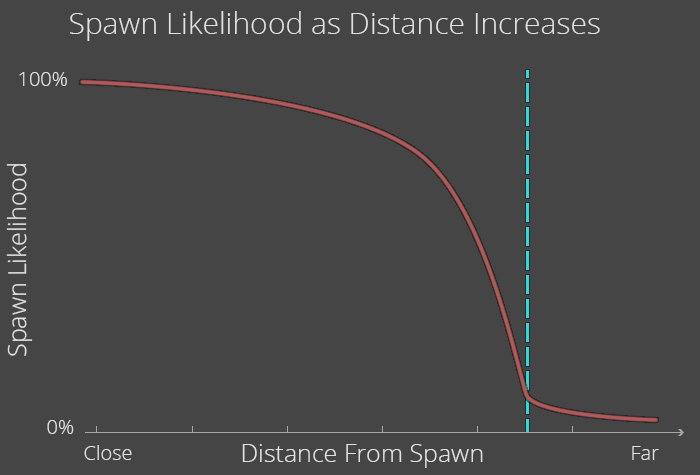
As you move farther from a spawn point, the percent chance of your teammate spawning there decreases, but not at an even rate. The percent stays relatively high as you move away from a spawn point, but then rapidly approaches zero as you approach a certain distance. This distance is shown in blue in the above images, and is the same for all spawns on all maps.
Spheres of Influence
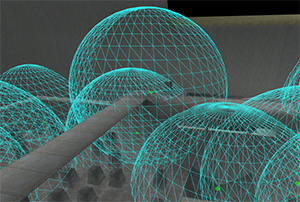
This distance extends in all directions, so you can imagine each spawn having a "sphere of influence" around it. If you are inside a spawn's sphere of influence, there is a good chance of your teammate spawning there, but if you are outside the sphere, your teammate will likely spawn somewhere else. In most areas of Halo's maps, you'll only be close to two or three spawns at any given time, so you can just take a few steps toward the spawn you want to give your teammate.
The Cool Stuff
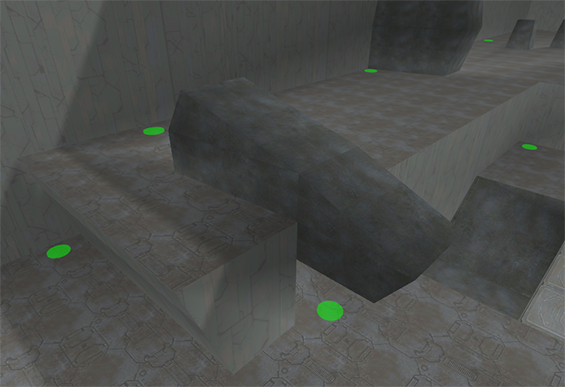
Blocked Spawns
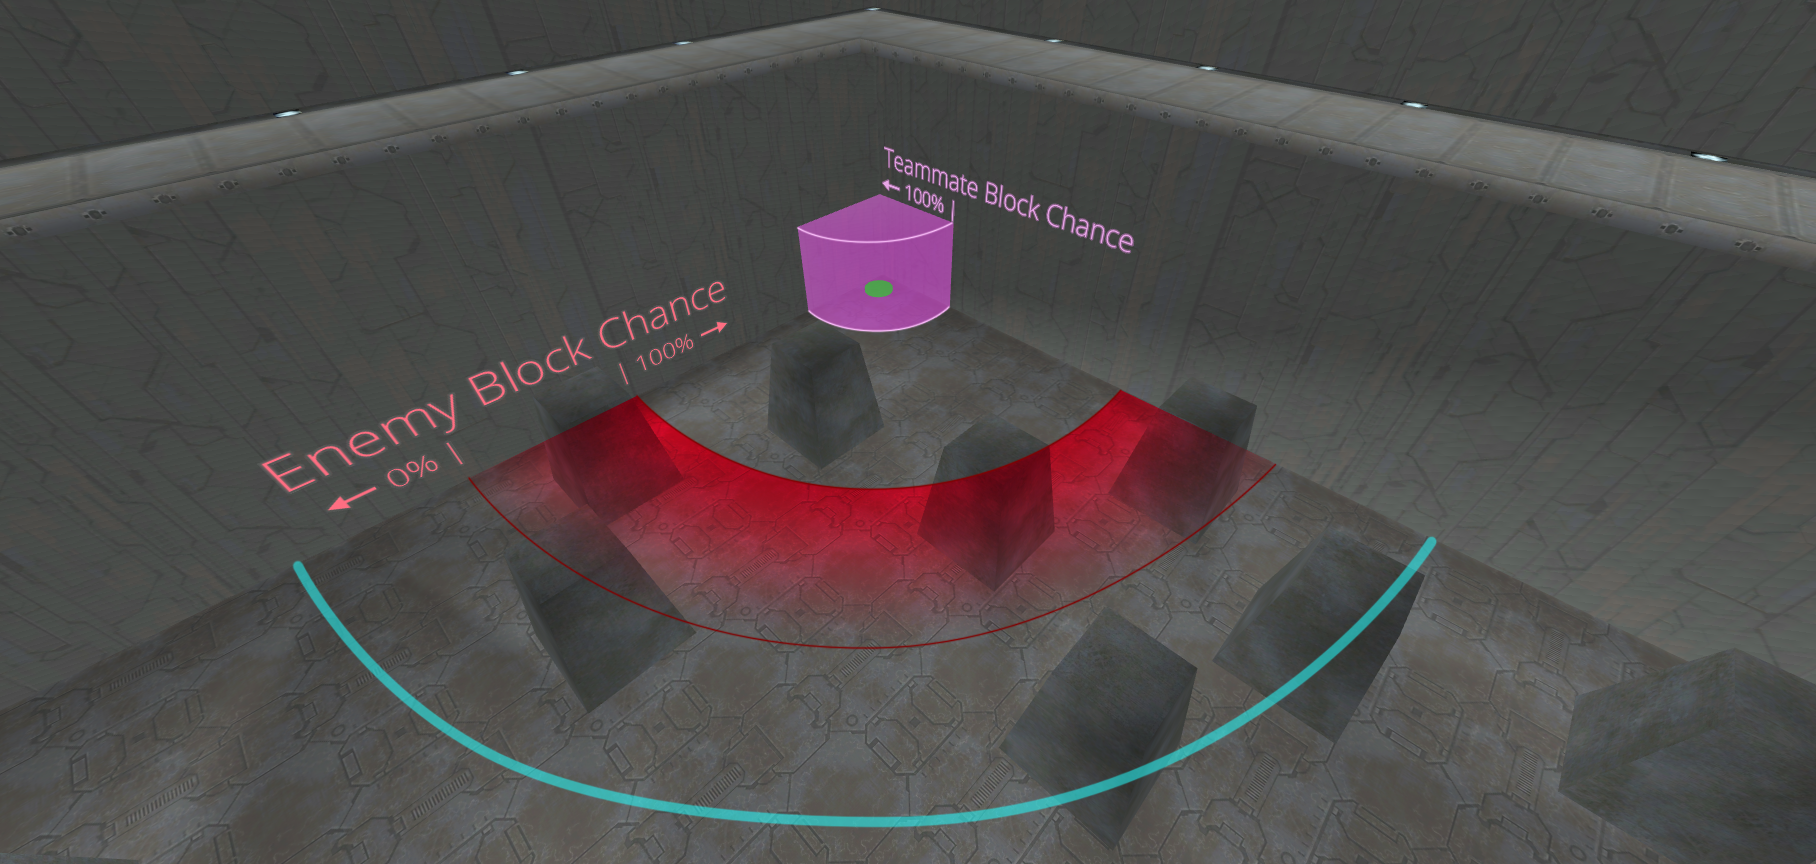
By standing very close to a spawn point, players can prevent the spawn from being chosen. As this image illustrates, teammates of the spawning player must be very close to a spawn point to block it, while enemies can block a spawn from farther away.
Forced Spawns
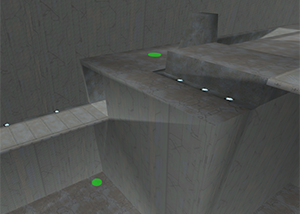
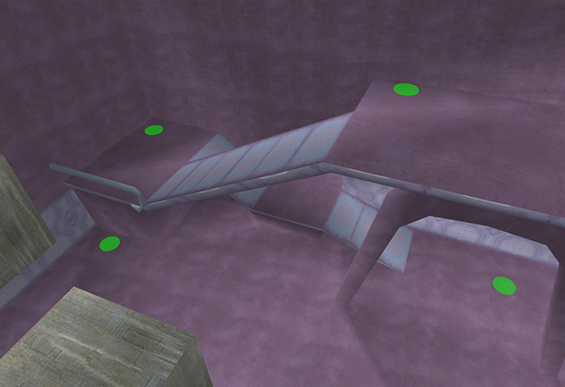
When a spawn is blocked, the game finds a new spawn by recalculating all the spawn percentages as though the blocked spawn does not exist. This is a good way to "force" your teammate to get a desirable spawn. An example of this is the pair of spawn points near the "blue pistol" area of Hang 'em High, shown in this image. If you block the lower spawn, your teammate is almost guaranteed to get the upper spawn.
Random Spawns
Now that you know how to spawn your teammates next to you, let's talk about how to get your teammates away from you. When all spawns have approximately the same likelihood of being chosen, the spawn is effectively random. There are several scenarios where a random spawn is possible:
- All teammates are dead.
- You are not inside any spheres of influence.
- All nearby spawns are blocked by teammates or enemies.
- The game chooses a low percentage spawn instead of a high percentage spawn (commonly called a "random" random).
In general, unless you need immediate help securing a weapon or powerup, it's a good idea to roll the dice and give your teammate a random spawn. If you find yourself trapped in a bad area of the map, the last thing you want to do is trap your teammate there with you. It's sometimes better to let yourself die if it means your teammate avoids a terrible spawn.
Large maps like Hang 'em High have many areas with no nearby spawns, making it easy to give a random spawn no matter which area of the map you're in. Small maps like Prisoner, on the other hand, have spheres of influence covering the entire map, so the only random spawns will come from an entire team being dead, enemies blocking spawn points, or the unlikely "random" randoms.
Some Notes
This guide was created with two versus two Team Slayer in mind. The same concepts hold for different gametypes and player counts, with the following caveats:
- There are no teams in Free For All, so every spawn is random.
- Maps have a separate set of spawn points for Capture the Flag, and those spawn points are separated by team color.
- When two or more teammates are alive, each teammate seems to have an equal influence on spawn locations, but more testing is required to verify this.
If you have any issues, feedback, or suggestions for the Halo Spawns project, shoot me a message just about anywhere @Mintograde, or on Xbox Live @Relyx.
Special thanks to chaosTheory and insidi0us for their excellent work deconstructing Halo's spawn system many years ago, and to everyone who's ever introduced a new player to the game we fell in love with.